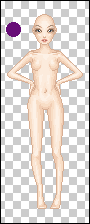
Here, I used one from Fainelloth Dolls.
You will also have to choose a color.

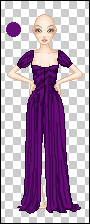
Using the Pencil tool (Diameter 1 px), draw the outline.


Create a new layer, below the outline layer.
Select it using the Magic Wand and fill it.
Set the outline layer blending mode to Multiply, but do not change the Opacity yet.
On the filling layer, select the dress.
Using the Brush Tool (Diameter 1, Hardness 100%), draw the shadows.

Pick the Blur tool and blur some areas.
(Now, I prefer Smudge.)

You can create more shadow layers if you wish.

To add the highlights, you have to create a new layer and set its blending mode to Screen. Everything else is the same as for shadows.
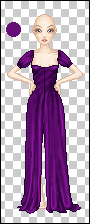
Now you can play around with the Opacity of all the Multiply/Screen layers.

Create a new layer, above all the other layers. Blending mode: Color.
Fill the dress.
Change its Opacity to obtain better results.
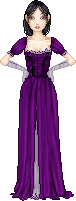
You´re done!